Account related issues
I am unable to log into ScholarOne Manuscripts. The system does not recognize my User ID and/or password.
Can I use the same credentials for multiple ScholarOne Manuscripts journal sites?
- To maintain user privacy, journals maintain their own separate databases of users, with journal-specific required account information. For this reason, users must create a separate ScholarOne Manuscripts account for each journal site you need to access.
- The exception to this is for portal-contained journal sites, where a publisher-level portal gives users access to several journals at the same website address (URL).
- TIP: To minimize the number of credentials you need to remember, we recommend linking your individual ScholarOne accounts to your ORCID iD for simplified login.
How do I link my ORCID to my ScholarOne journal account?
- On the Login page, click Log In with ORCID iD.
Don’t see this button? Contact the journal directly to request that they add this functionality to their journal site.
- Clicking takes users to log in to ORCID or to create an ORCID account on the ORCID site.
- If you have used this login process before or have already linked your ORCID iD to your ScholarOne profile, you will automatically be logged into the ScholarOne site and the process is complete.
- If this is your first time linking your ORCID and ScholarOne accounts, you will be asked to authorize the publisher or journal to get their ORCID iD and to read limited-access information such as their name and address. These permissions make it easier for new users to pre-fill their profile information when creating an account.
- Once linked, you will be automatically logged in to the ScholarOne site.
- On future logins, you may use either your ScholarOne or ORCID credentials to log in to the participating site.
The system does not recognize my User ID and/or password
- Mistyping your User ID or Password.
- Typing with the Caps Lock key active on your keyboard.
- Inadvertently adding extra characters or spaces at the beginning or end of the field when cutting and pasting the information from an email.
- Not distinguishing characters properly when directly typing in the User ID or Password. Some common problem areas are with the following:
- The upper or lower case letters V (V, v) and W (W, w)
- The number zero (0) and the upper or lower case letter O (O, o)
- The number one (1) and the upper or lower case letter I (I, i)
- Entering an outdated or incorrect User ID or Password.
- Not updating your primary e-mail address (which may be associated with an institution) at the ScholarOne Manuscripts site when your institution has changed. Your User ID at the ScholarOne Manuscripts site does not change automatically when/if you update your address at the journal site. Click on your name at the top right of any page after log in in order to update your account information.
- Attempting to use an expired temporary single-use password. If you use the Reset Password tool on the Log In page to submit a request for an email with your password, that email may include a temporary single-use password with instructions on how to create a new secure password. The temporary password will have a 72-hour expiration, and once expired, a new request for a temporary password will have to submitted.
- Submitting multiple requests using the Reset Password tool but not using the latest system generated temporary single-use password. The Password Help email should arrive soon after requesting it but delays could occur, or the email could be filtered into your Spam or Junk folder. Requesting the Password Help email more than once will reset the temporary password each time.
I have forgotten my password and/or my User ID
Try resetting your password:
- On the Log In page, click on Reset Password.
- Enter Your Primary E-mail for This Site in the text box below.
- After clicking the Send Reset Link button, you will receive an email that provides a temporary single-use password with instructions on how to create a new secure password.
As noted in the Password Help email you receive, a temporary password has a 72 hour expiration. If the expiration date is passed you will have to use the Reset Password option again to request a new temporary password. You should receive the Password Help email soon after requesting it. Sometimes your email server may be running slow and it could take a few minutes. Check your Spam or Junk folder to see if the email was filtered there.
NOTE: Requesting the Password Help email more than once will reset the temporary password each time, so you will have to use the most current temporary password to continue.
I have requested my password from Password Help and have not received a reply
There are several possible reasons why you are not receiving your Password Help email:
- The system does not recognize the email address you entered as belonging to a ScholarOne Manuscripts account. An error message will appear in a yellow text box that says, “We are unable to locate an account associated with the e-mail address you provided.” If you have alternate email addresses you can try entering them in the Your Primary E-mail for This Site field. If you do not remember the email address that is noted on your account, please contact the Journal Administrator or ScholarOne Product Support for assistance in resolving this issue.
- Your email server is filtering the incoming emails from ScholarOne Manuscripts into a spam folder, either at the client level (in your email inbox) or at the server level. We have worked hard to prevent this, but in some cases it will still occur. If this is the case, your IT department will need to resolve the issue by whitelisting the ScholarOne server address: uranus.scholarone.com. Whitelisting the address will identify the email address as a legitimate sender and properly route the emails to the intended recipients.
- You have more than one account or your account is “hidden.” An error message will appear in a yellow text box that says, “We are unable to locate an account associated with the e-mail address you provided.” Please try creating a new account using the same email address or contact the Journal Administrator or ScholarOne Product Support for assistance in resolving this issue.
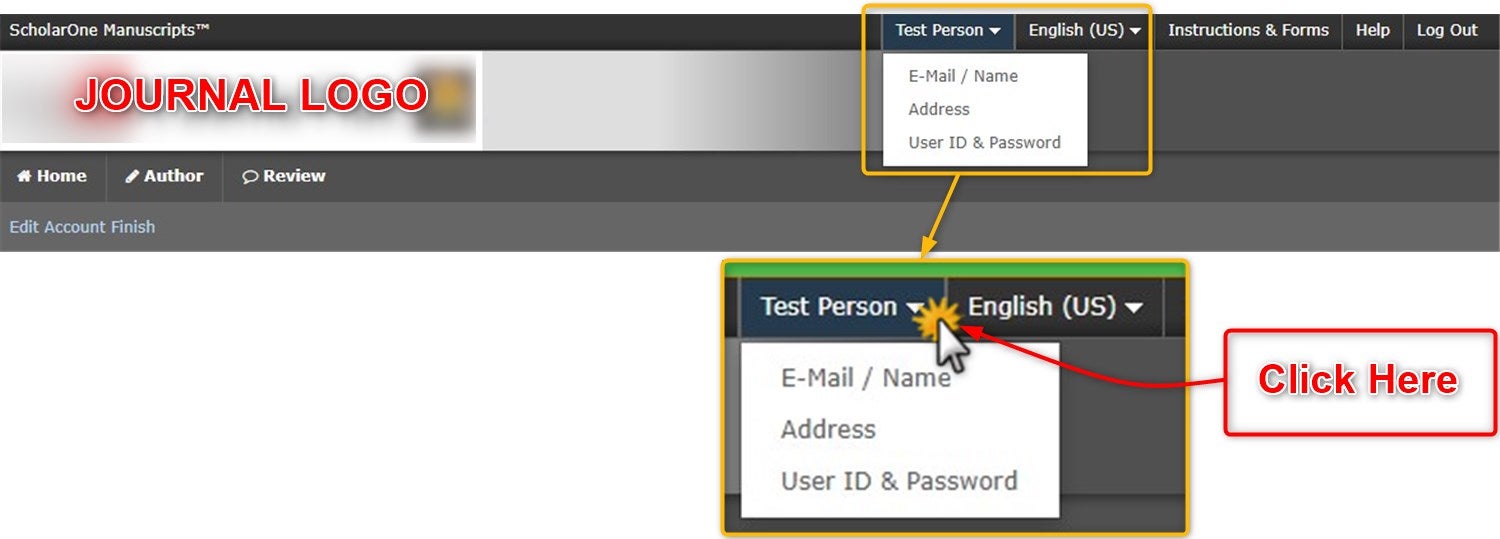
In order to update or edit your ScholarOne Manuscripts account on a specific journal, you will first need to log in. Once logged in, on the upper-right of the page, click the link with your name on it. Then, click one of the three links that appear, depending on what information needs to be updated. Here is a list of fields with which link to click in the drop down:
E-Mail / Name
- ORCID
- Salutation
- First (Given) Name
- Middle Name
- Last (Family) Name
- Degree
- Primary E-Mail Address
- Primary Cc E-Mail Address
- Secondary E-Mail Address
- Secondary Cc E-Mail Address
Address
- Institution
- Department
- Address
- Country
- State/Province
- City
- Postal Code
- Phone
- Fax
User ID & Password
- User ID
- Password
- Keywords (Journal-specific)
- Unavailable Dates
- Signature
Once you have made the necessary changes, click Next until you are able to click Finish. If you change your mind about updating specific fields, you may click Cancel.
To associate your ORCID iD with your account on ScholarOne Manuscripts journal, please follow the steps below:
-
-
-
- Log in to the journal’s submission site
- Click your name at the top-right corner of the page
- In the drop-down menu select Email/Name
- Under the ORCID section, you will find two links: Create an ORCID iD and Associate your existing ORCID iD
– If you already have an ORCID ID, select Associate your existing ORCID iD - You will be directed to the ORCID site login page where you will need to log in using your ORCID account credentials
– If you have selected to create an account on the ORCID site, click Register Now - After logging in you will be automatically redirected to the ScholarOne submission site where it will show up a prompt with the following text:
You can update this account with data from your ORCID iD record that is not marked as Private.
Name and e-mail fields will be imported to your account.
Note: this will overwrite existing data. Would you like to update your account now?- To complete the process, click OK to update the journal’s ScholarOne Manuscripts site. Click Cancel to return to ScholarOne Manuscripts without updating the data.
- Proceed to the User ID & Password step, and click Finish to be sure that your account information is properly saved.
-
-
In order to log in to ScholarOne Manuscripts journal using ORCID login credentials, on the journal’s Login page, click Log In with ORCID iD.
– Don’t see this button?
Please contact the journal directly and check with them whether they are planning to add this functionality to their journal site.
Clicking Log In with ORCID iD takes users to log in to ORCID or to create an ORCID account on the ORCID site.
Once the ORCID login credentials are entered, check the user information and click Authorize Access.
You will then be taken back to the ScholarOne site and will be able to use a Create Account button or Log in with an Existing Account button.
If you select Log in with an Existing Account, you will need to enter your current login information for your ScholarOne account.
After this, your ScholarOne Account will be linked with your ORCID account.
On future logins, either ScholarOne or ORCID credentials may be used.
NOTE:
Users with accounts on multiple journals will need to go through the process described above for each site.
Please view our instructional video on ScholarOne TV channel on YouTube.
The two-step device authentication has been added as a default feature of ScholarOne Manuscripts for users with higher access permissions.
The two-step device authentication adds another layer of security to users with access to sensitive data and powerful toolsets within ScholarOne Manuscripts.
It is available by default for roles greater than Author and Reviewer.
In case that journals wish to have an extra layer of protection, an additional configuration is required for users with Author and Reviewer roles only.
How does Two-Step Device Authentication work?
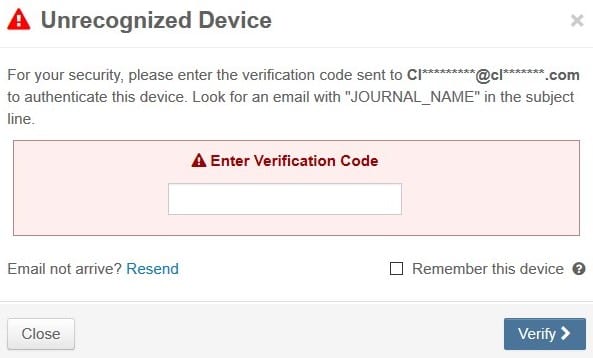
- When a user logs in from a device the system does not recognize against their unique system identifier, an Unrecognized Device message will be displayed.
- This will automatically generate and send an email to the primary email address of the user logging in, containing a verification code that expires in 30 minutes.
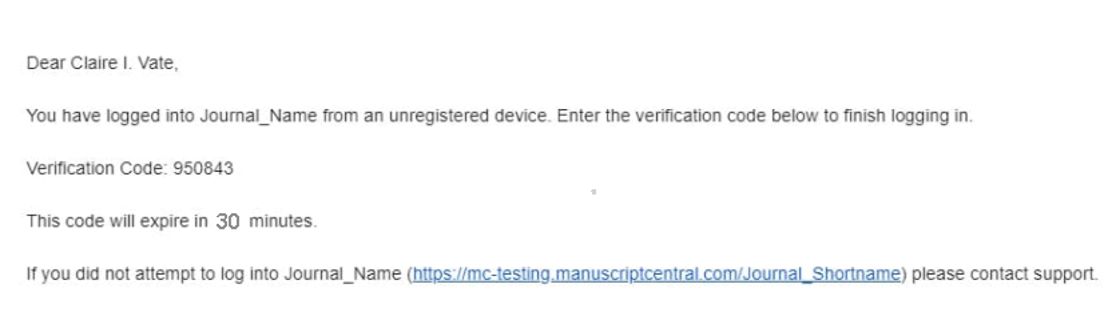
- Please log in to the email account in question and enter the verification code in the Unrecognized Device modal and click Verify. The email address associated with the account in question will not be fully displayed in order to protect the account from unauthorized access.
- Please be sure to select Remember this device (if you are not using a shared device) to store the Device Authentication for 6 months in order to reduce the need to re-verify in the immediate future.
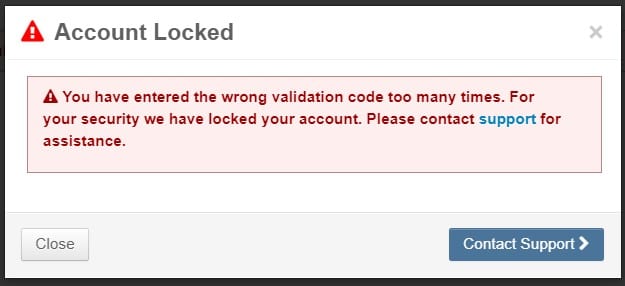
Entering an incorrect verification code too many times will lock an account for 45 minutes.
After 45 minutes, the user will be allowed to try again and will receive another email with a new verification code.
Also, you may contact support in case that there are any related issues that you would like to report.
Important Notes
Device authentication and browsers
Device authentication will also recognize the browser that you are using.
For example, once you complete the verification process with Chrome browser and then try to log in with Firefox, you will need to complete the verification process for that browser as well.
Clearing browser cache re-triggers the device authentication. If you are being prompted to enter a code every time when logging in, check if your browser is set to clear cache automatically. For more information, please see the knowledge article: How to turn off the option to auto-clear cache?
Incognito or private browsing mode will also require you to authenticate your device each time you try to log in.
Device authentication and emails
If you are not receiving a verification email from the system, first check Spam and Junk folders. If the email is not there, make sure to safelist manuscriptcentral.com domain. This might need to be done by your IT department. For more information, please see the knowledge article: Domain Safelist Frequently Asked Questions
If you are not receiving any emails from ScholarOne system, your email address might be blocked. Please reach out to ScholarOne Customer Care team to resolve the issue.
Device authentication and code window
If the window to enter the code does not display, make sure to turn off the browser’s automatic translation function or clear the browser cache and try again. For more information, please see the knowledge article: What is internet browser cache and how is the cache cleared or emptied?
Check if your popup blockers are disabled. For more information, please see the knowledge article: How do I disable pop-up blockers for all Internet Browsers and Third-party Toolbars?
Device authentication and portal accounts
For journal sites that are under portals, in which, after log-in, users have access to several journals at the same website address (URL), the authentication will work for all journals under a portal once completed on one journal.
Also, you may contact support in case that there are any related issues that you would like to report.
The User ID and Password you have received are for access to our Get Help Now site. This is how you can submit and track cases in our Support Center. In order to access the Self-Service Portal, go to:
ScholarOne Manuscripts: http://mchelp.manuscriptcentral.com/gethelpnow/support.htm
ScholarOne Abstracts: http://mchelp.manuscriptcentral.com/gethelpnow/abstractcentral/support.htm
and click on My Support Cases. Use the login information provided in the email to submit new cases and track your previously submitted cases. You can also use this page to Add Comments or Add Attachments to a case.
NOTE: Your ScholarOne Self-Service Username and Password are NOT the same as for our ScholarOne Abstracts and ScholarOne Manuscripts sites; they can only to be used to access to your Support Cases.
If you are attempting to create an account or log into a journal submission site, an error message is received that says, “In order to ensure accuracy, you are required to type the e-mail address into this field.”. This issue is caused by having the AutoFill feature enabled in your browser. AutoFill functions like a copy and paste function, which is not permitted in the email address field when creating an account or logging into a journal submission site.
The email address must be manually typed into the email address field. Please also be aware that the system prevents one from pressing multiple keys together at one time. If this action takes place, the same message will appear to the user as the simultaneous pressing of keys on a keyboard is not considered typing. The AutoFill feature can be disabled by accessing these instructions via the links below:
There are a number of settings available at the journal level to unsubscribe and/or opt-out of peer review invites.
Please note, there is no general option to unsubscribe from all ScholarOne journals because each publisher (or an individual journal) maintains its own database of users.
To access the options below, please log in to your account and click your name at the top right corner of the page.
Please see below the options available when you edit your account:
Would you like to receive notifications and offers from this publisher?
* This is an optional setting, so not all journals use it.
It does not control the user’s availability for peer-review on a given journal.
With this option, users may choose to opt-in or opt-out of marketing mailing lists.
This means that some publishers may use this to send periodical marketing and promotional emails to those who have chosen to opt-in.
Do you wish to be invited for peer review?
* This is an optional setting, so not all journals use it.
It does impact whether the user can be invited to peer review on that journal’s site.
If the box is checked, account owners may receive invitations to review.
If it is NOT checked, the account owner will NOT be invited to participate as a reviewer.
Unavailable Dates
This is available for all ScholarOne journals.
It does impact whether the user can be invited to peer review on that site.
During the time period set under the Unavailable Dates section, the user will be deemed unavailable and will not be invited to participate in peer-review.
Remove my account
This option is available under -Privacy Acknowledgment- section and is available on all ScholarOne journals as a part of GDPR (General Data Protection Regulation) compliance.
If this option is selected the account information will be removed from the journal’s submission site.
Please note, this does not remove the information that users may have stored on the journal’s publisher’s home site or elsewhere outside of the ScholarOne Manuscripts submission site.
Links to ScholarOne Privacy Notice can be found under this section as well as the journal publisher’s privacy notice (if provided).
At the bottom of this section, there may be the following message:
We cannot automatically remove your account at this time. Please contact the journal at [editorial office email address] for assistance. You must be unassigned from manuscripts, your roles must be expired, and possibly more.
In that case, please use the email address provided in this section to contact the journal’s editors and send a request for account removal.
Once a user chooses to remove the account from the submission site, no future communications are sent to them unless they create a new account.