Follow these steps:
Step 1:
To gain access to the Custom Fields feature, you first must have administrator access. If you are a single license user, you are administrator. Please contact your support desk for further information on this access.
Step 2:
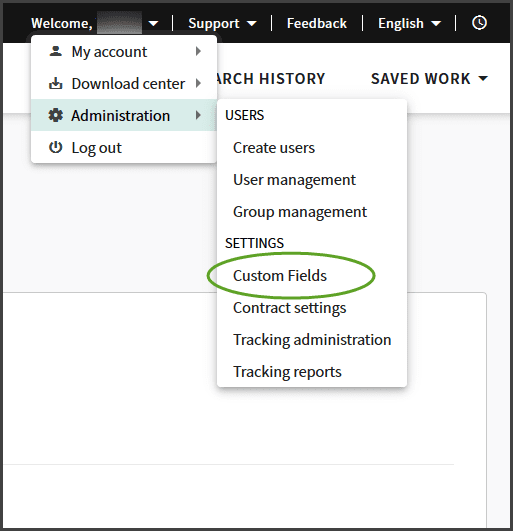
Login to Derwent Innovation, go to Welcome and select Administration section. A sub menu will open and select Custom Fields field:
Step 3:
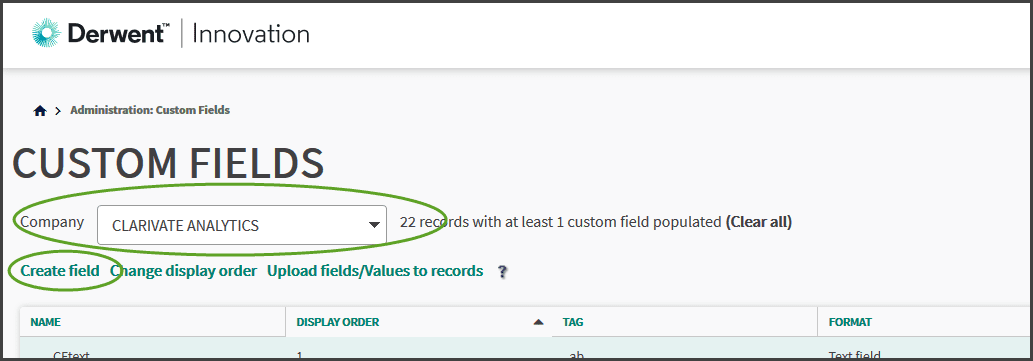
From the next screen you will be able to select the company your subscription belongs to. There should only be one unless you have multiple accounts over different subsidiaries. Once the company is selected you can begin to create custom fields. Select the “Create field” option displayed in the banner:
Step 4:
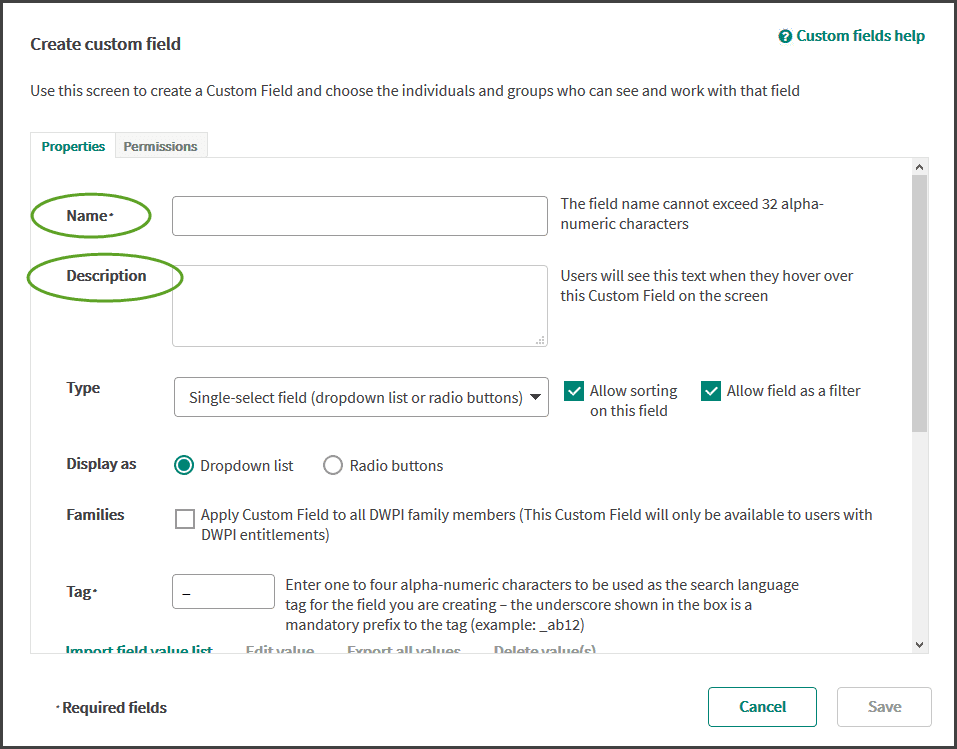
From the pop-up window, we can now create custom fields. Firstly, we need to give the field a name, it is a mandatory field, and this will be the name of the field that we can select from the custom field search field on Derwent Innovation fielded search page. It is also a good idea to add a description in the box in case other users are using the custom field and would like to know its purpose and what it covers on contains:
Step 5:
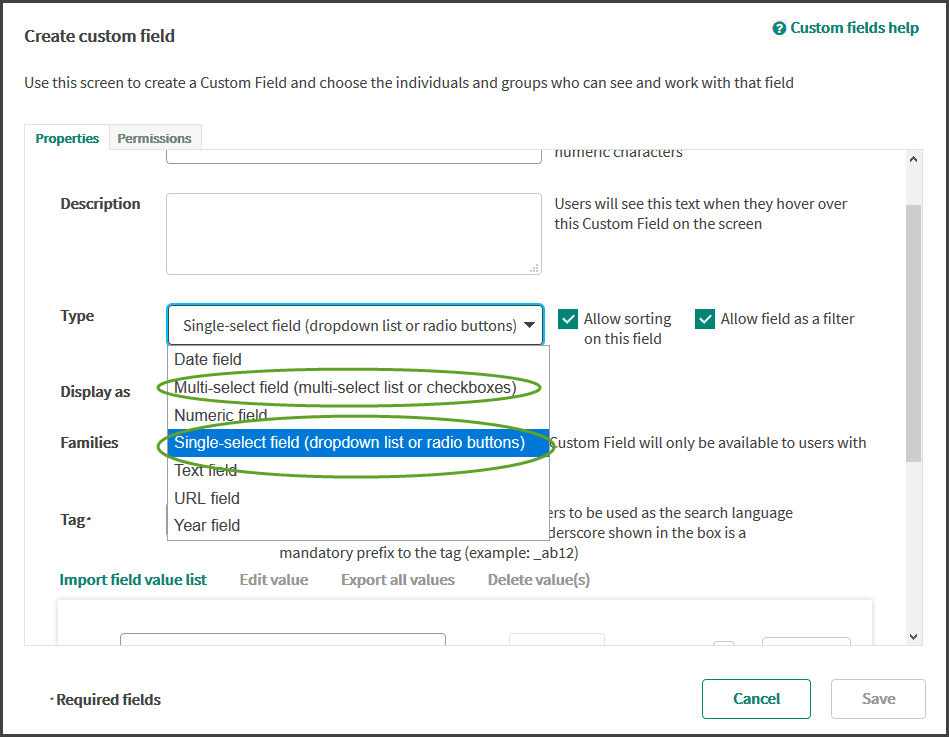
Next, we need to select the type of custom field. We can select whichever field we need among a pre-defined list. It really depends of the way a user would like to organize document tag strategy. “Multi-select field” are helpful and powerful if user would like to choose from i.e. choosing multiple options for the same patent. The “single-select field” is also helpful where you may want to choose only one option per patent family:
Step 6:
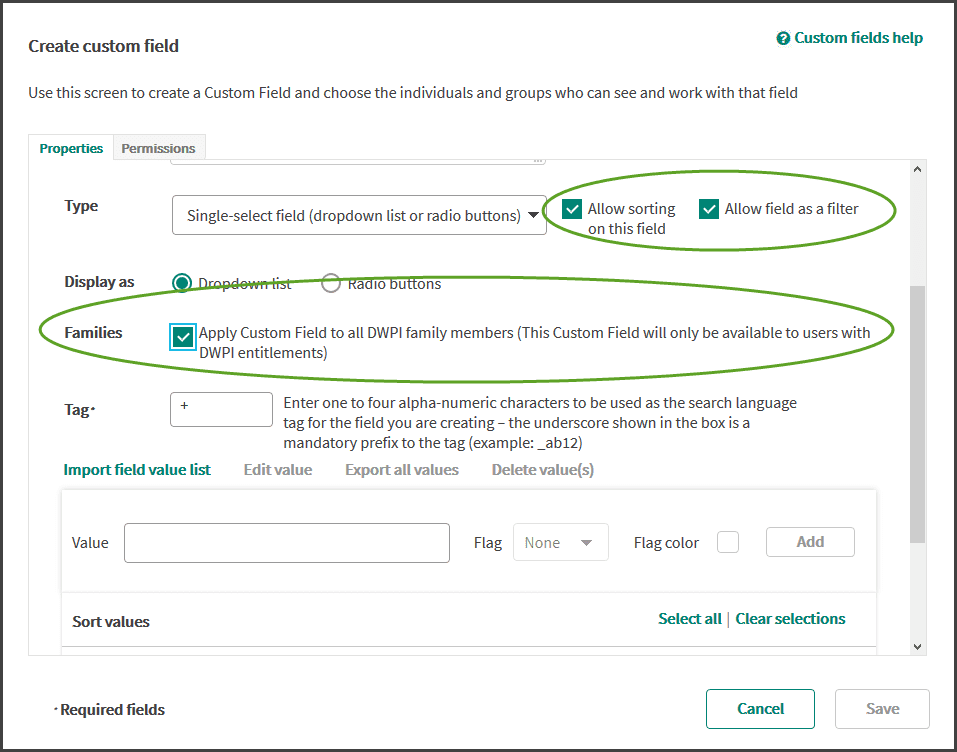
Make sure to have the “allow sorting on the field” and the “allow field as filter” box selected. Also select the option listed next to “families”, this will allow any custom fields created to be applied to every DWPI family member. This will make custom fields more efficient and save time.
Step 7:
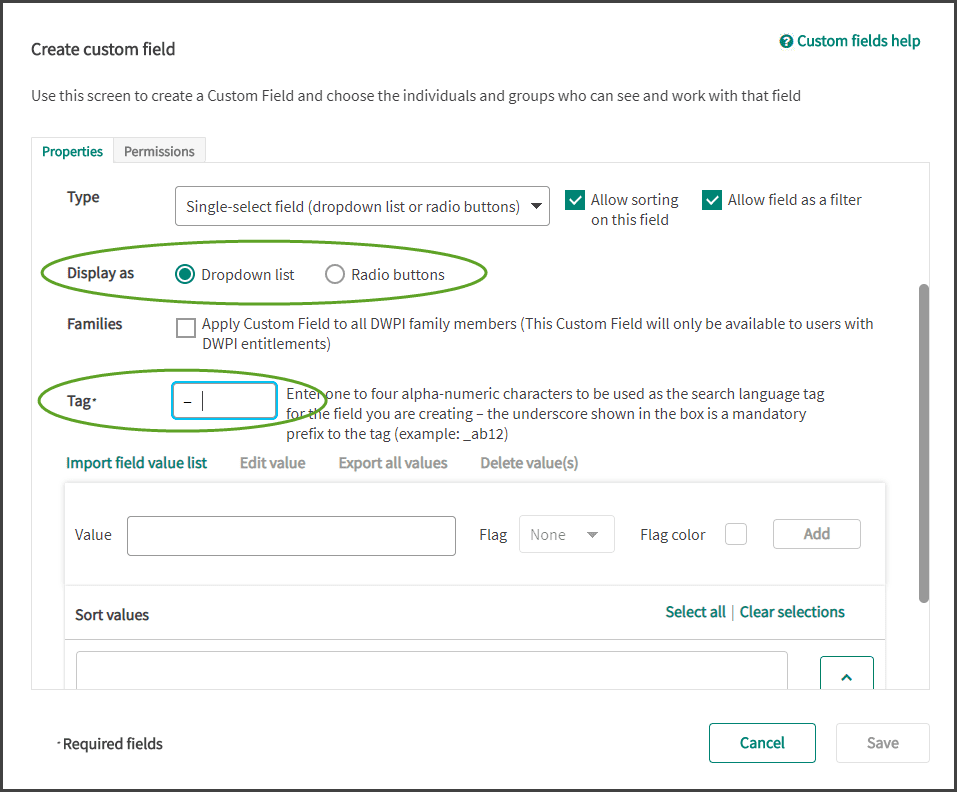
We need to select one of the “Display as” option. This will display custom fields as either a dropdown list or a series of radio buttons. Either of these is fine and comes down to personal preference.
Finally, enter a 1 to 4 alpha-numeric characters into the tag field. This is to be used as the search language tag for the field you are creating. This is basically how Derwent Innovation identifies and searches the data you add into it. The underscore shown in the example is a mandatory prefix to the tag (example: _ab12):
Step 8:
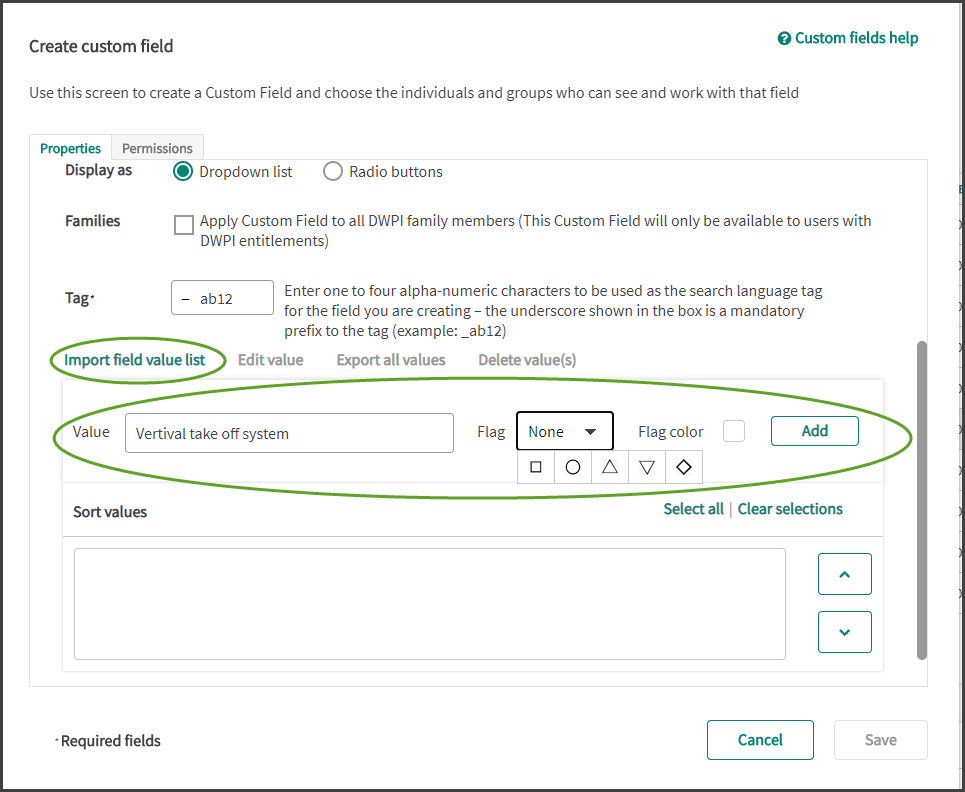
We now need to add the values we want to create. We can do this in the “value” box. Simply follow these steps:
- Enter the name of the field you want e.g. Company name, subject, Business unit.
- Select a flag. This a shape that helps identify the custom field easily
- Optionally elect a flag color. This color may help identify the custom field more easily
- Click on add button
- Repeat all these steps as many fields as you want to create
If you already have a list of fields, you can import them directly into Derwent Innovation via the “import field value list” button. This may save some time if you already have a list of custom fields you want to use easily.
Step 9:
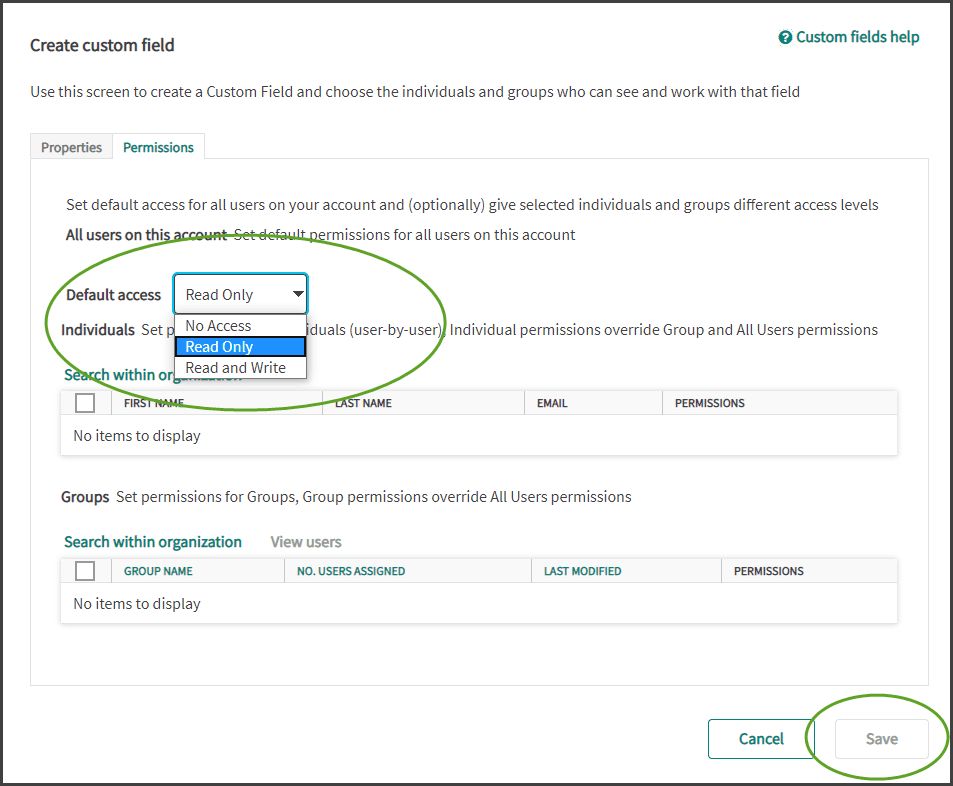
Lastly, we need to adjust the “Permissions” tab. Here you can choose 2 levels and the options are as follow:
- No access (others can’t view the custom fields you create)
- Read Only (others may only view the custom fields you create)
- Read and Write (others may view, edit and annotate the custom fields)
Once complete, click on “Save” button and you are done
Tag documents with custom fields – 2 options:
Option 1:
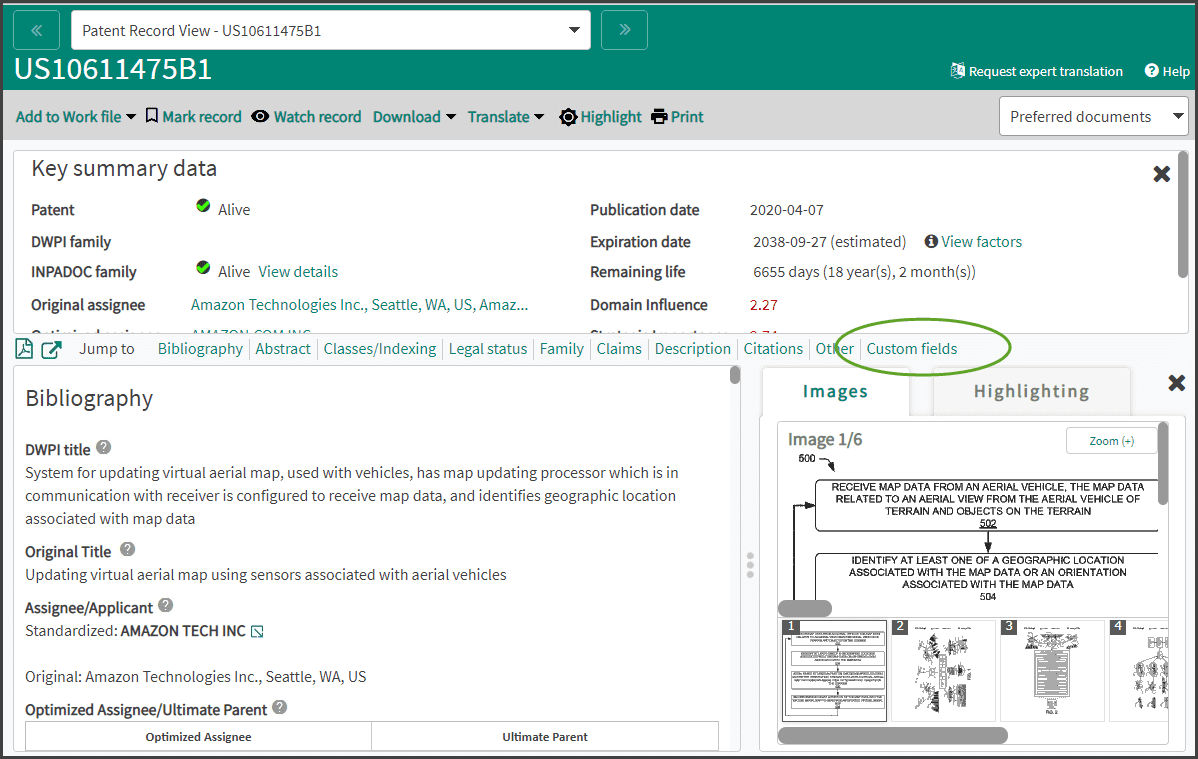
After running a search and having a result set, open a document, go to individual record and jump to “Custom fields” section:
Option 1:
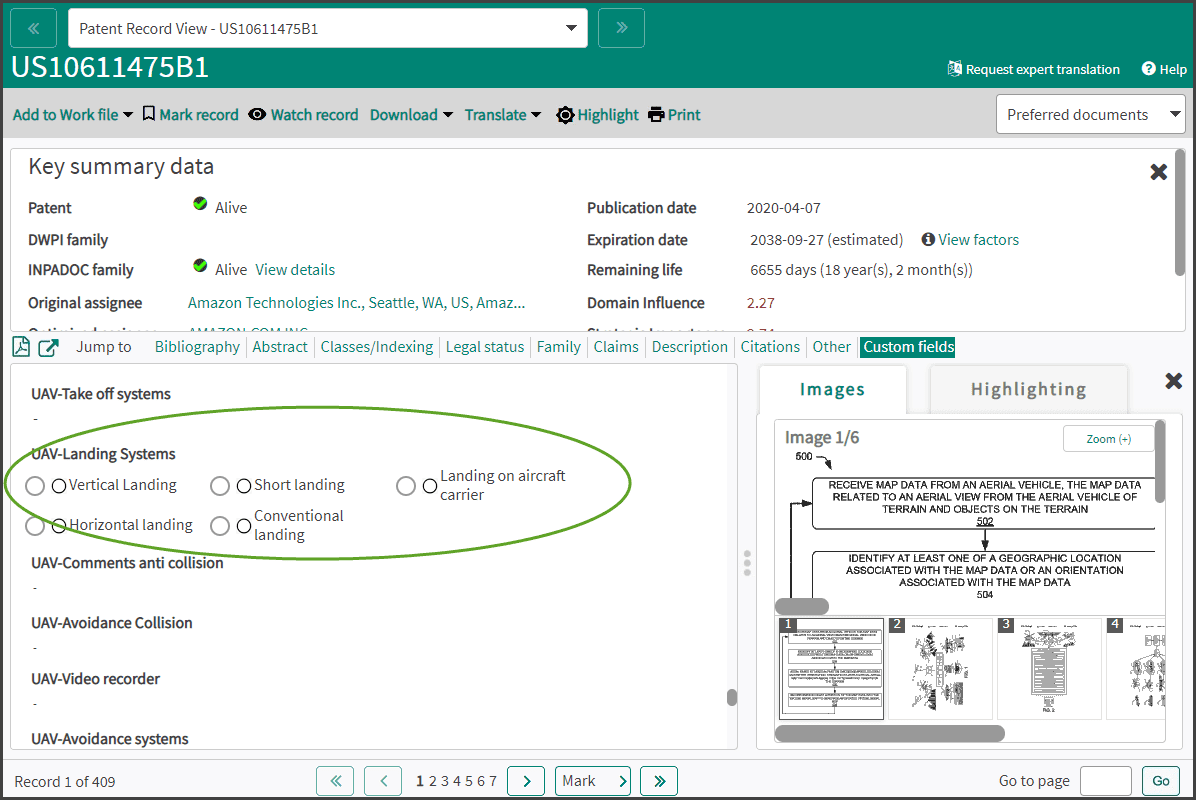
You will reach the bottom of the individual document. Select the appropriated custom fields and tag the value you need. Your tag choice will saved automatically
Option 2:
From a result set, select a list of documents, go to “Edit custom fields” button at the bottom of the screen. A new window will open, search for the fields you need to access and tag the appropriated tags. The effect will that all selected documents will tagged at the same time.

Search via Custom Fields
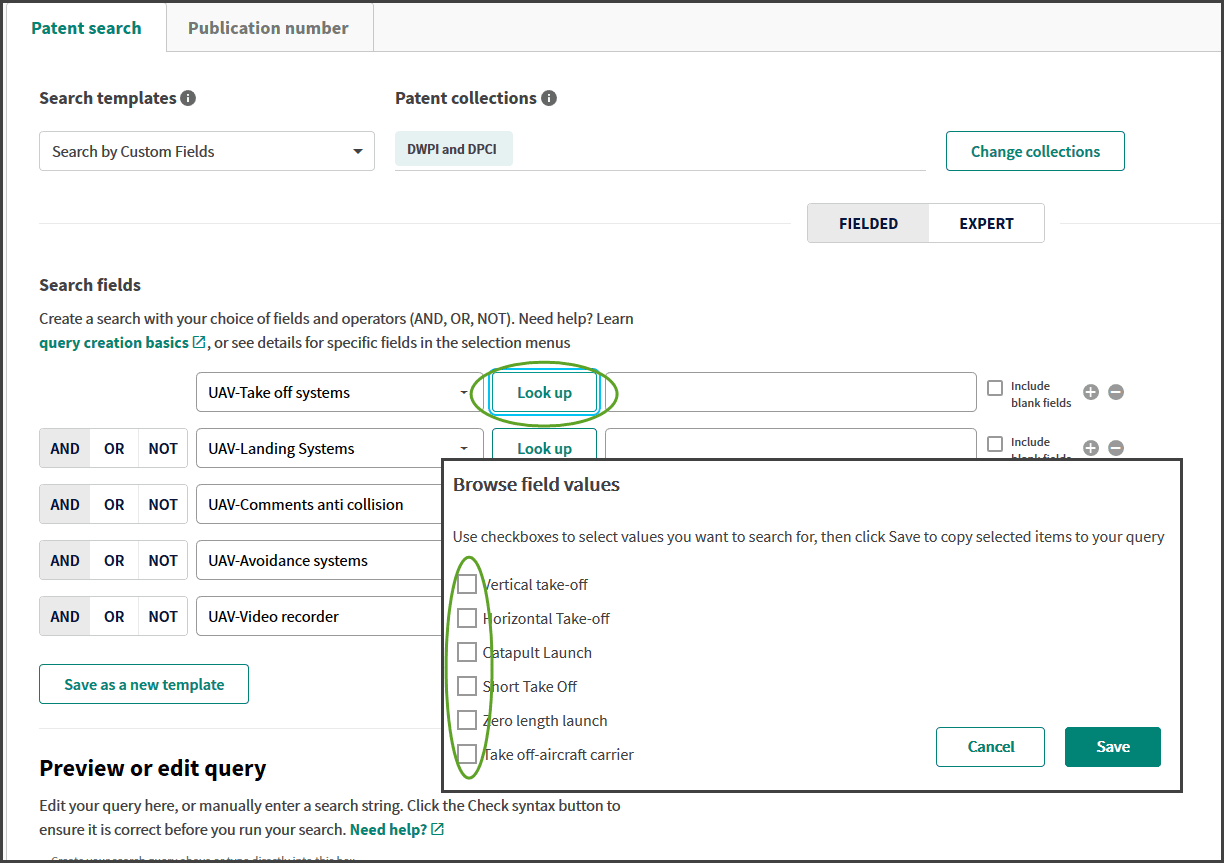
Custom fields are now searchable like any other search fields, they can be combined between themselves or with any other search fields. In the search dropdown menu, there are located at the bottom of the sub search field options:

Look up
Select a sub search custom field and then open the look up to access to the values. Select the values you need to retrieve, possibly combine this search fields with other search fields and click “Save” button
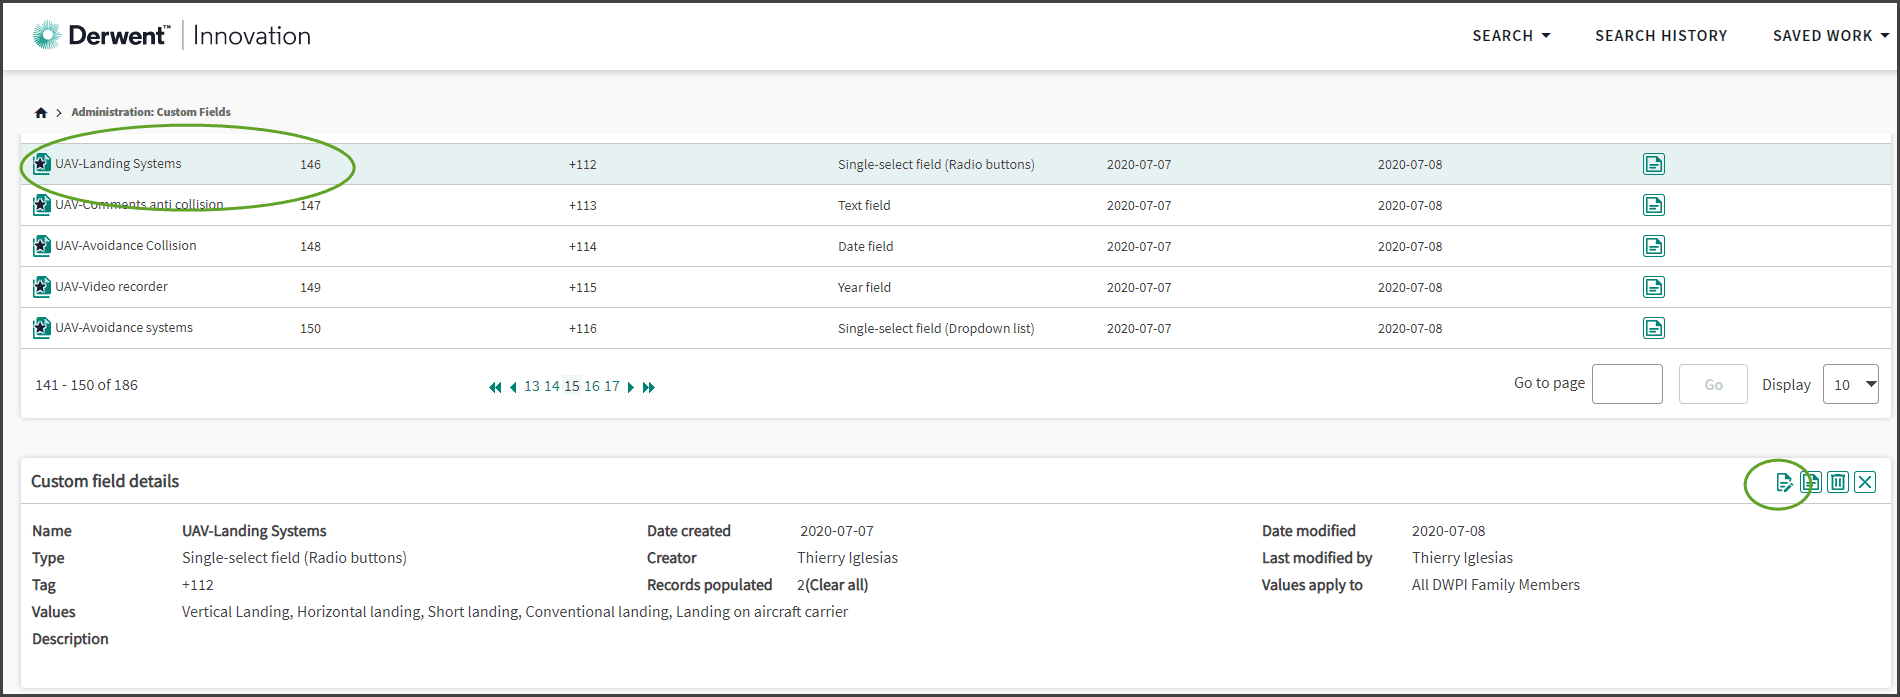
Editing Custom fields
It is possible to modify custom fields parameters. Chose the custom fields you want to edit by clicking on it with the mouse (it will turn grey). Then select the “edit this custom field” button in the bottom right corner and make changes you need